Employee Portal
Employee Portal FAQ
Username: Social Security Number including dashes
Password: Social Security Number including dashes
Self-Service Tools, Documents, and Information
Employee Portal Login
Your PRISMHR employee profile will be complete and ready for access roughly one week after submitting new hire paperwork. Check stubs are instantly available as soon as payroll is processed. W2s are always digitally available for previous employment and current tax year documents are available by Jan 31st.
Step 1: Go to HR Employee Portal Login
On your mobile or desktop browser, navigate to hrs-ep.prismhr.com
Step 2: Click “Employee Portal”
Click the yellow button labled Employee Portal to navigate to the Employee Portal Login.
Step 3: Click “Register”
From within the Employee Portal login page, click Register. Please enter all information on the page including SSN and e-mail.
Paystub Guidance
FOR DESKTOP

Step 1: Click to Select Your Company
Click the profile button in upper right-hand corner to open the company selection view.
Note: If you worked for multiple companies, there will be separate paystubs for each company which need to be accessed individually.
Step 2: Navigate to Pay History
Click on the left navigation panel and select “Pay > Pay History”
Step 3: Download Your Paystub
Select the paystub you want and click the blue "Download Paystub" text.
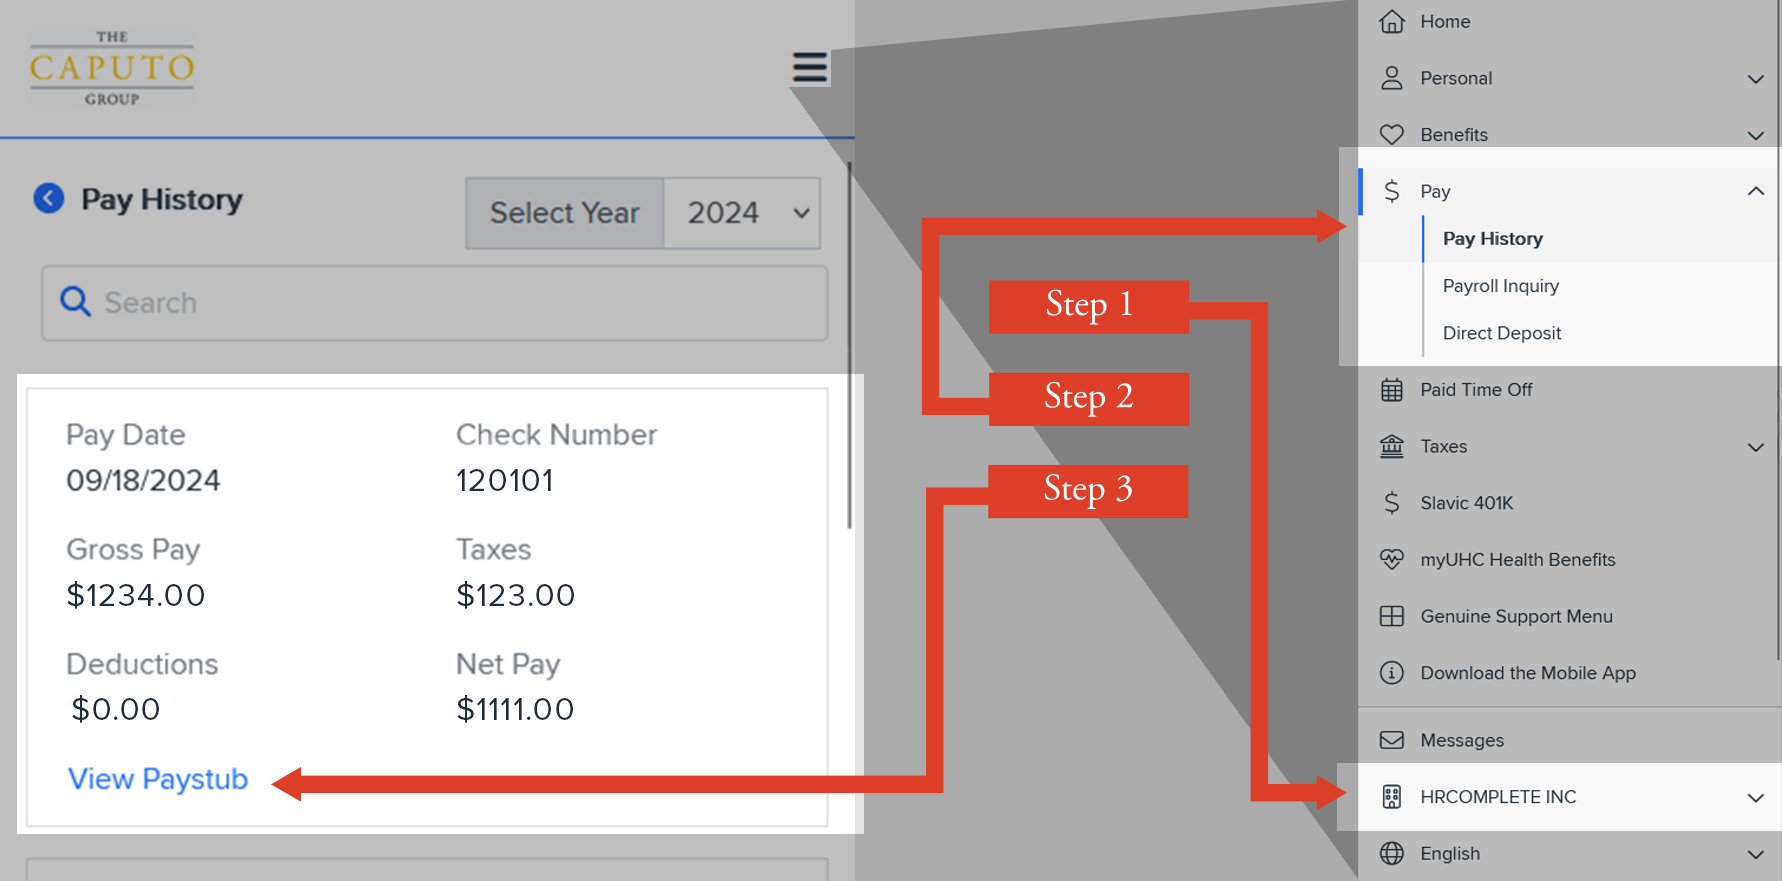
FOR PHONES

Step 1: Click to Select Your Company
Click on the right navigation panel via the ≡ button and find the company selection.
Note: If you worked for multiple companies, there will be separate paystubs for each company which need to be accessed individually.
Step 2: Navigate to Pay History
On the same navigation panel select “Pay > Pay History”
Step 3: Download Your Paystub
Select the paystub you want and click the blue "Download Paystub" text.
W-2 Guidance
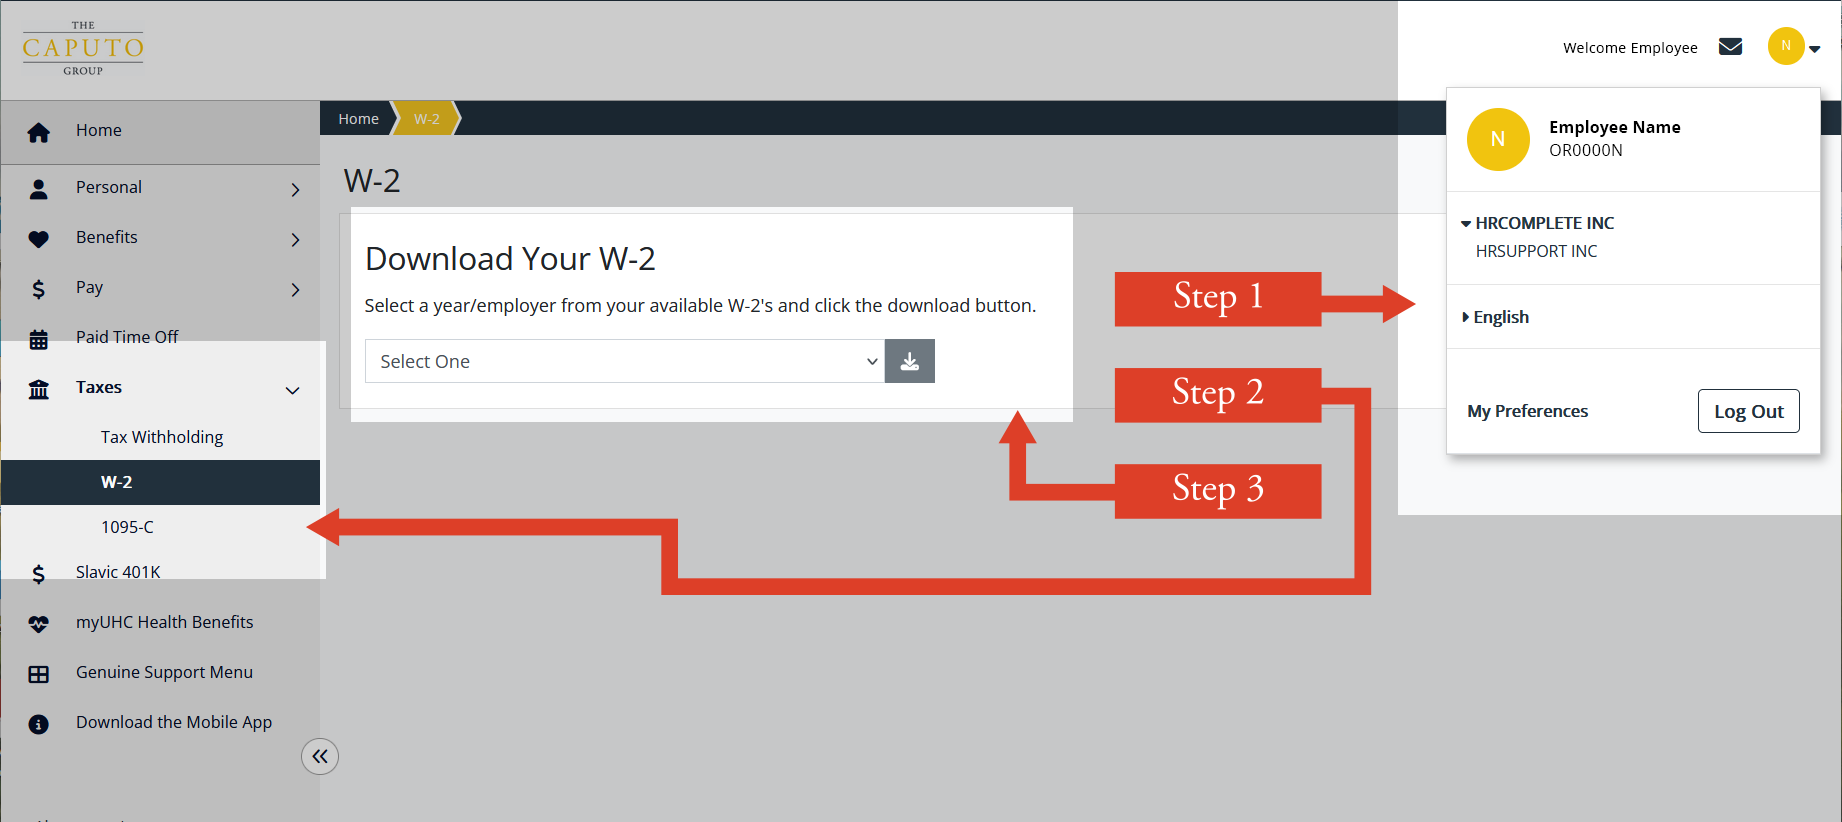
FOR DESKTOP

Step 1: Click to Select Your Company
Click the profile button in upper right-hand corner to open the company selection view.
Note: If you worked for multiple companies, there will be separate W-2s for each company which need to be accessed individually. Please download W-2s associated with each company you’ve worked for.
Step 2: Navigate to W-2
Click on the left navigation panel and select “Taxes > W-2”
Step 3: Download Your W-2s
Select the tax year for your current company and click the blue button ↓ to download. W-2s from prior year will be available for download on 1/31.
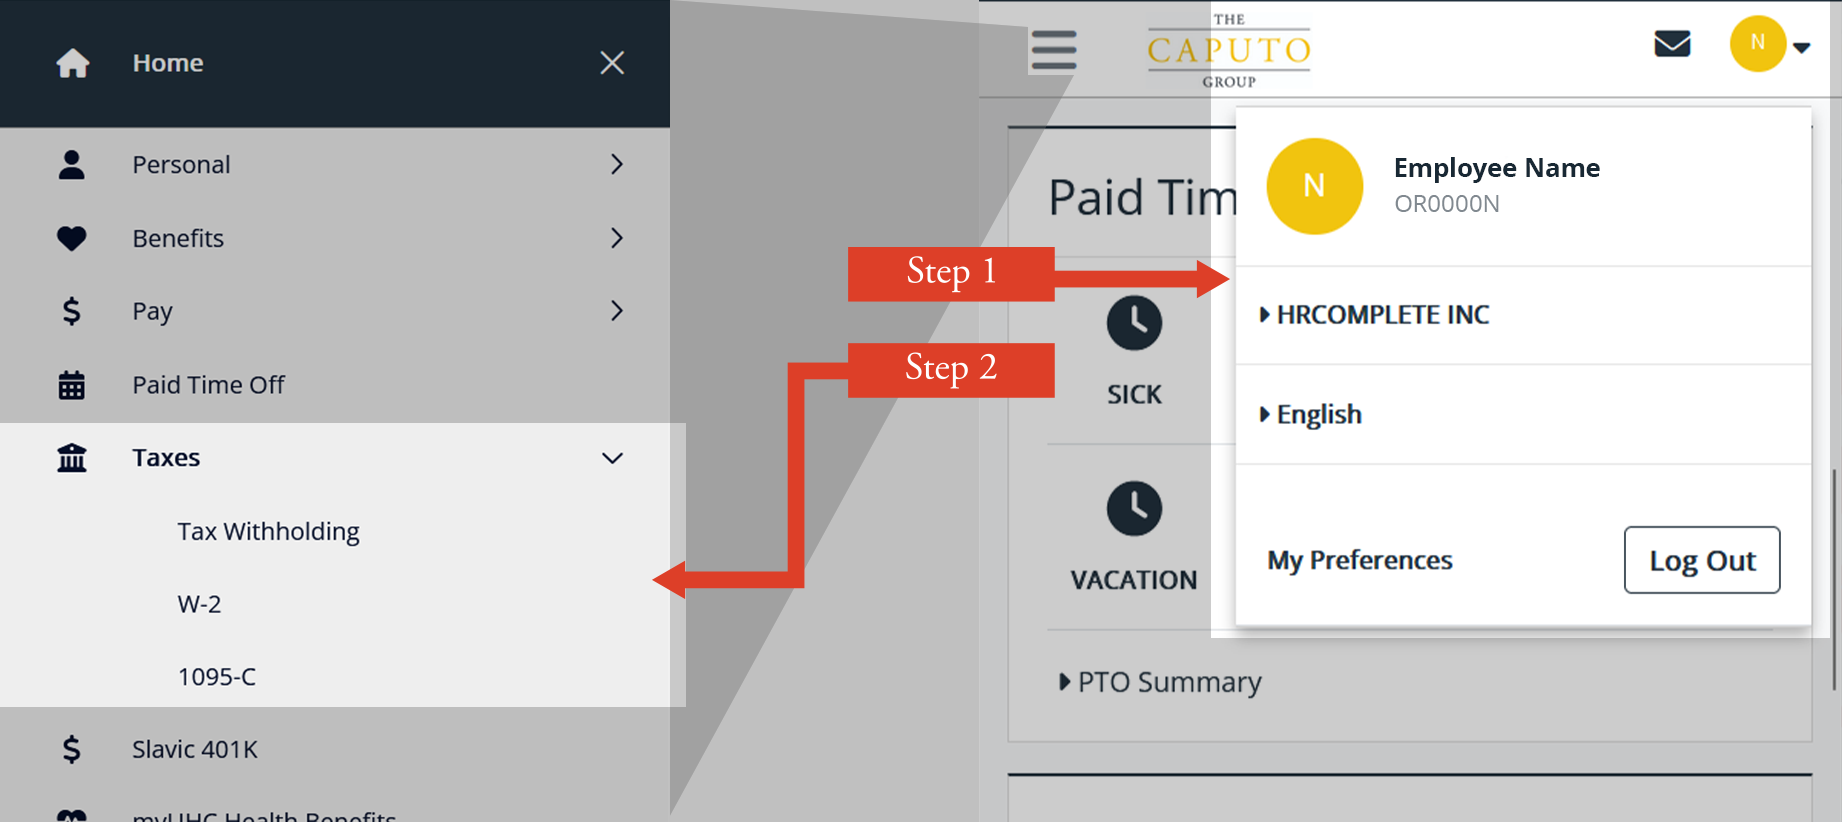
FOR PHONES

Step 1: Click to Select Your Company
Click the profile button in upper right-hand corner to open the company selection view.
Note: If you worked for multiple companies, there will be separate W-2s for each company which need to be accessed individually. Please download W-2s associated with each company you’ve worked for.
Step 2: Navigate to W-2
Click on the left navigation panel via the ≡ button and select “Taxes > W-2”
Step 3: Download Your W-2s
Select the tax year for your current company and click the blue button ↓ to download. W-2s from prior year will be available for download on 1/31.
W-4 Information and Guidance
This is not meant to act as a certified preparer and/or translator. Please read all instructions on the federal (and applicable state) W4 Form(s) prior to filling in the information. W4 Forms are meant to be filled out by the employee, not on their behalf. Please fill this form out digitally or with black ink. W4 Forms have a front page to be filled out in its entirety, as well as instruction and worksheet pages. Please retain instruction and worksheet pages as needed for tax purposes.
Download the latest version of the W-4 Form from the IRS website.
Step 1: Personal Information
The first section of the form are the fields for your contact information:
- Name and Address: List your full legal name and a current address where you can receive your W-2.
- Social Security Number: If you don't have a social security number you can submit a W-4 if you fill out Form SS-5 to register for a social security card.
- Filing Status: Check the box for your status of single or married filing separately, married filing jointly or head of household. The IRS has an Filing Status Tool to help you determine your filing status.
You can stop here and your employer will withhold at default levels. To get the right balance between paycheck and your refund, you might need to complete one or more additional steps – especially if you want to avoid additional withholdings or surprises when you file.
Step 2: Other wages
If you have multiple jobs or are filing taxes jointly with someone who has a job you need to fill out step 2. You may skip this step if this is your only source of income. This section can influence the amount withheld; if you think this section applys to you please use the worksheet included ith the W-4 packet or use the Tax Withholding Estimator on the IRS Website.
Step 3: Dependents
If you meet certain income criteria and have qualifying children under age 17 or other dependents, you can claim a tax credit in this step. This section may also be left blank.
Step 4: Other Adjustments
Step 4 has three fields you can fill out to share miscellaneous income and other deductions:
- Non-work income, like interest and retirement income.
- Other deductions from the IRS Deductions Worksheet.
- Additional tax amount you want withheld each pay period.
Step 5: Signature
You must sign and date your W-4 for it to be valid.
